What? Slides? From Markdown?
In early 2019, I wrote a piece called Why You Should and Should Not Use Markdown. I talked a little about where Markdown came from, what makes it interesting, and some of the arguments for and against it. Since then, I have been experimenting with Markdown even more. This piece is part of a series of posts about things you can do with Markdown.
It’s true! You can make a slide presentation from Markdown, and not just a dancing bear. There is a growing number of tools to do just that. I tested a few ways to build slide presentations using Pandoc and one standalone HTML presentation format called Remark.
It took some experimentation, but in the end I learned a lot about what each tool can do. Here is what I found.
Making Slides with Pandoc: the Basics
Pandoc is an everything-to-everything converter, and one of its neatest tricks is turning Markdown into slides. If you can do simple things on the command line, you will have no trouble: Pandoc is easy to install and use.
When using Pandoc, you can start your Markdown file with YAML metadata or a simple block like this:
% Title
% Author Name
% Date
Then write some Markdown for your slides. Pandoc uses the following rule to figure out what header level to use for slide titles:
By default, the slide level is the highest header level in the hierarchy that is followed immediately by content, and not another header, somewhere in the document. In the example above, level 1 headers are always followed by level 2 headers, which are followed by content, so 2 is the slide level. (source)
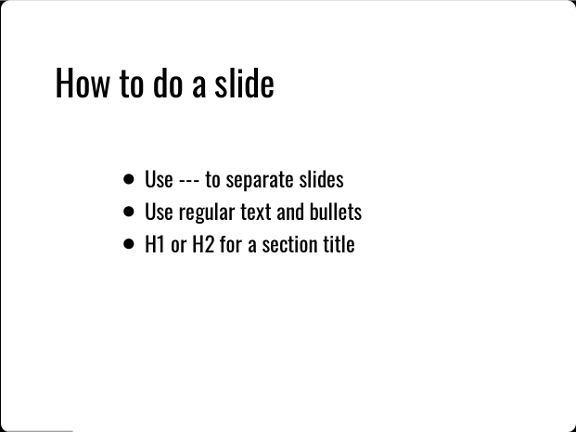
That seems a little complicated, so I played with the Markdown a bit to see what worked in different presentation formats. In general, an H1 or H2 header works for a section header or slide title. Most other Markdown works as you would expect. Some presentation tools work best if you separate slides with three hyphens (---).
Building a presentation with Pandoc is simple:
pandoc -t <format> -s myslides.md -o myslides.htm
Pandoc can build slides from several formats. I tried a few including S5, Slidy, and slideous. I’ll focus on two in particular: DZslides and Powerpoint.
DZslides
If you want to do one of those slick presentations with big images and very few words, DZslides is an easy way to do it.
Here’s some sample Markdown:
---# H1 or H2 is a Section Title---Normal Text for Slide Title- Bullet
- Bullet---
DZslides uses an H1 or H2 as a section header, which you will probably mostly have on a slide by itself. Normal text is big enough for a title or announcement on a slide.

The layout of slides in DZslides is bold and simple; you probably won’t find yourself using tables or columns a lot.
Once you have created your slides in Markdown, build them with Pandoc:
pandoc -t dzslides -s myslides.md -o myslides.htm
The -s option tells Pandoc to create a standalone presentation, including all the CSS, HTML, and JavaScript needed to display it. You can view the resulting HTML file in a browser.

Remember, since it’s HTML, you need to keep the images and the presentation together. If you copy your presentation to a thumb drive without the images, you will be unhappy. It’s a good idea to create the Markdown presentation in a folder with all the images it needs, make sure it works in your favorite Markdown editor’s preview mode, then use Pandoc to build the presentation in the same folder. You can copy the folder wherever you need it, knowing that all the images are there.
Powerpoint
With Pandoc, you can go from Markdown directly to Powerpoint. This method offers a great deal of formatting flexibility. Columns, tables, sub-bullets, and images come out just the way you would expect them to look. I had no trouble opening a Pandoc-rendered .pptx file in Powerpoint or importing it into Google Slides.

Here is some sample Markdown:
# Section Title## Slide TitleText on a slide:* Bullet
* Bullet
* Bullet::: notes
Speaker notes go here
:::
For Powerpoint slides, Pandoc doesn’t require the hyphen separator. The above Markdown contains two slides: one with an H1 as a section title and another that uses an H2 for the slide title. Notice the ::: — Pandoc’s fenced div syntax, which lets you do a lot of tricks in various formats. Here, it is just used to delineate the speaker notes.
The Pandoc command to build a .pptx file is simple:
pandoc myslides.md -o myslides.pptxAs you would expect, you don’t need the -s flag (because what is the alternative to a standalone Powerpoint presentation?) and you can open the resulting .pptx file in Powerpoint. But there’s one more piece of magic:
pandoc myslides.md -o myslides.pptx --reference-doc another.pptxWhen you run the command with the --reference-doc parameter, Pandoc takes the theme from the specified existing Powerpoint file and applies it to the new one you are creating.
That means if you have a theme you like, you can create a whole presentation in that theme — no one will know you started with Markdown. This feature doesn’t always work with heavily modified presentations or corporate templates, but I was able to get it to work with built-in templates and one template that I had customized.
More Pandoc Tricks: Divs and Attributes
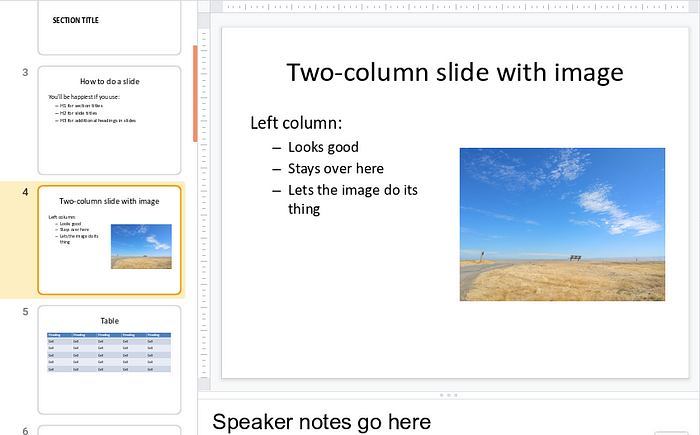
That fenced div notation lets you create columns using nested divs without writing <div> tags in HTML. Take a look at this example:
:::::::::::::: {.columns}
::: {.column width="50%"}Left column:- Bullet
- Bullet
- Bullet:::
::: {.column width="50%"}:::
::::::::::::::
That translates to a <div class="columns"> containing two <div class="column"> tags that Pandoc can understand. It uses these to create a slide with columns. Notice that the opening and closing of the outer div has a whole bunch of : characters instead of just three. This is for readability; you can use as few as three if you like.

The curly braces let you define attributes such as identifiers, classes, and key/value pairs on headers, images, and a few other elements in Pandoc. If you’re using Pandoc to create Word or other long text documents, this is handy because you can set anchors on headings and link to them internally.
Above, we are just using the attributes to add the column and columns classes to the fenced divs to create columns. But there is another cool attributes trick from Pandoc that we can use — scaling an image:
{width=25%}When Pandoc renders the image, it is scaled to a percentage of the container where it resides (a slide or column, for example). The alt text is used for a caption.
Making Slides without Pandoc
If you don’t want to use Pandoc, consider Remark: a standalone slide presentation that you edit directly. Because it uses Markdown nestled inside an HTML document, your favorite Markdown editor might get confused. Mine did. This makes it a little less convenient to edit.
On the other hand, you don’t need Pandoc — so you don’t need a computer — so if you are stuck in an airport with nothing but your phone, Remark might just be your smartest choice.
The Markdown is a little different, but shouldn’t look unfamiliar by now:
class: center, middle# Remark template
.right[Author]
.right[Date]---# Slide titleNormal text:* Bullet
* Bullet
* Bullet???
Speaker notes go here---
Remark provides some rudimentary CSS to style slides. The first slide uses an H1 header as a section header. The simplified CSS code class: center, middle puts it in the middle of the slide. I added smaller text for the author and date, using .right to right-align it. You can use.right, .left, and .center to align text in different positions on the slide. This does not mean you can easily create columns in Remark. You can do it, but it requires authoring more complicated CSS.
You can use H1 or H2 for slide titles — I prefer H1. Speaker notes are set off with ??? and the usual --- separator denotes slide boundaries.

You don’t have to build a Remark presentation; it just is. You can open it in a text editor and a browser. Any changes you save from the text editor show up in the browser when you reload. Like other browser-based slide tools, remember that you need to keep your images where the HTML expects to find them.
There is one important choice to make with Remark: you can work with a standalone presentation containing the entire JavaScript that makes it work; a standalone presentation that references the JavaScript from another local file; or a presentation that references the JavaScript from online. The first option is longest but most “standalone,” and the last is the shortest (and therefore easiest to edit) but requires connectivity.
Examples
I created a presentation in each of the tools discussed in this post. Here are my presentations and their Markdown source:
- DZslides [Presentation / Markdown]
- Powerpoint [Presentation / Markdown]
- Remark [Presentation]
You’ll quickly see the limitations of each tool, but you’ll also see their power. It’s actually pretty easy to create cool slides in Markdown.
Update: If you want more information, I actually wrote a book that talks about this (and other Markdown stuff): Markdown Dreams: How to do things with Markdown and Git
